


How to line a fireplace recess with smooth board (*lining part 1)
5 mins
How to line a fireplace recess with smooth board
The lining process
Introduction

This article deals with the smooth lining of a fireplace recess. The closure plate (the roof above the stove that blocks off the chimney) is an important part of this process. The fitting of the stove, focussing more on the closure plate, is outlined in more detail in a separate article that you should read after reading this article (closure plate is fitted after lining the sides and rear of your fireplace): How to connect a wood stove to a chimney liner.
If you are going to line the inside of a fireplace (rather than render or just paint) then you’ll be using some kind of fireproof lining-board. Do NOT use plasterboard of any kind inside the recess, even the pink fire-resistant stuff, as this is not allowed: plasterboard is not officially non-combustible (plasterboard is okay on chimney breast though).
Before we get stuck in, there are various ways of making the inside of your builder’s opening look like something other than a dark, soot-stained hole in the wall. You can tart up what you have (e.g. keep the stone or brickwork), filling any deep holes with mortar and maybe adding a lick of paint (brickwork can look very good painted with a few coats of emulsion).
You might choose to render the brickwork or go the whole hog (where did that phrase come from must check…) and make smooth with board for that perfect look. There are also a couple of "lazy methods" that are surprisingly effective. It might be worth reading all of this article before deciding.
Do NOT use plasterboard of any kind inside the fireplace recess, even the pink fire-resistant stuff, as this is not allowed as plasterboard is not officially non-combustible (plasterboard okay on chimney breast though).
Whilst installing for a living, the "smooth-lining with board" was my favoured method (over rendering) and approx. 90% of all my in-recess installs followed this method: the end result is very tidy. It is a method worked out and improved over the years. It is “suburban” smooth. It takes a little more effort but provides a professional finish for the more discerning client ;-). I say “was” my favoured method because now I no longer install and thinking about all that effort makes me break out in a sweat. I also like the “lazy” method below but this may be too basic for some.
The following articles may also be of use
The Stovefitter's Manual
Wood burning stoves installation advice and buyer's guides. Welcome to The Stovefitter's Manual.
Buying & DIY

Quick links: opening up a fireplace and making good
DIY Guides
Quick links: Hearths
DIY Guides
Opening up a fireplace for a wood stove
DIY Guides

Painting the inside of a fireplace recess
DIY Guides

How to fit a fireplace lintel
DIY Guides
Fit the smooth board closure plate (*lining part 2)
DIY Guides
Building Regulations for wood burning stoves – who are Building Control and who polices?
DIY Guides
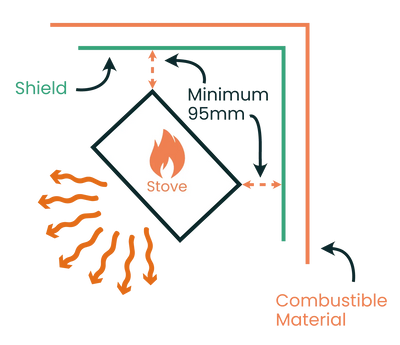
Heat shields for wood burning stoves and distance to combustibles
DIY Guides
Infographics for wood burning stove purchase and install
Infographics
The fastest method of lining a fireplace recess
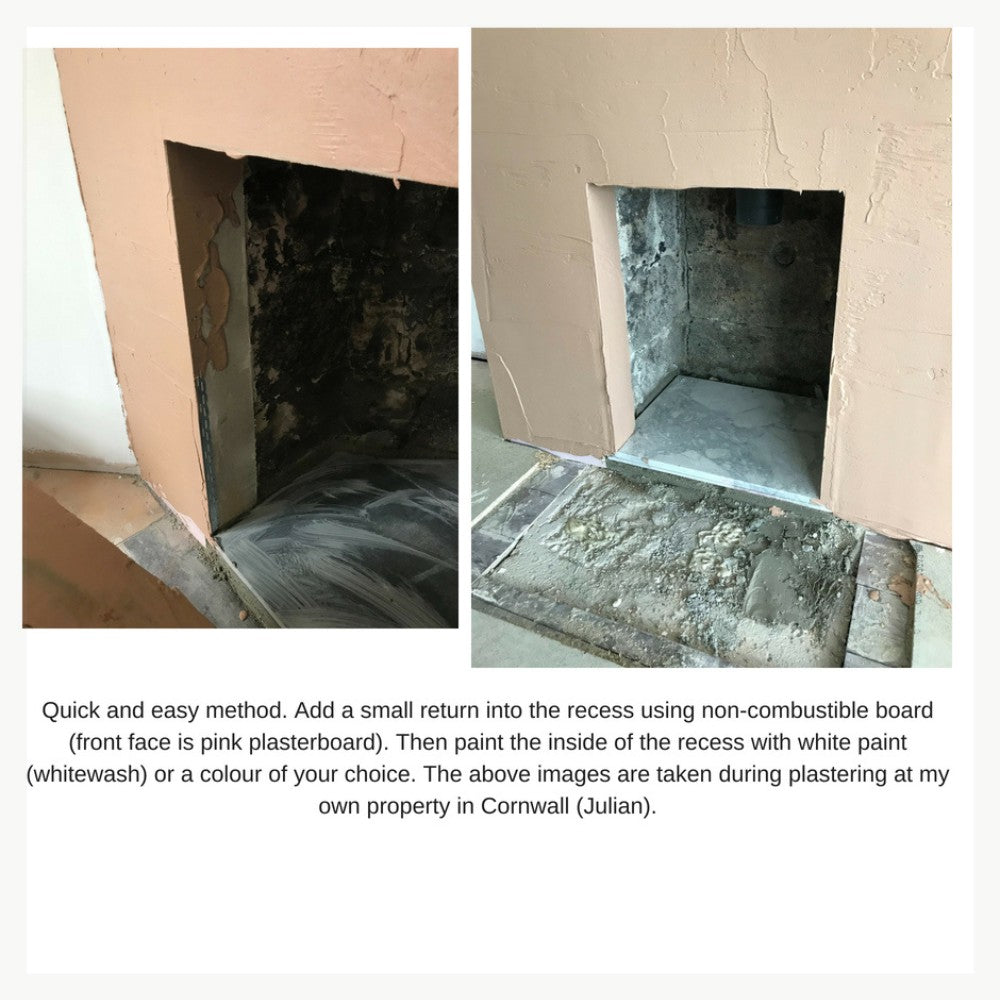
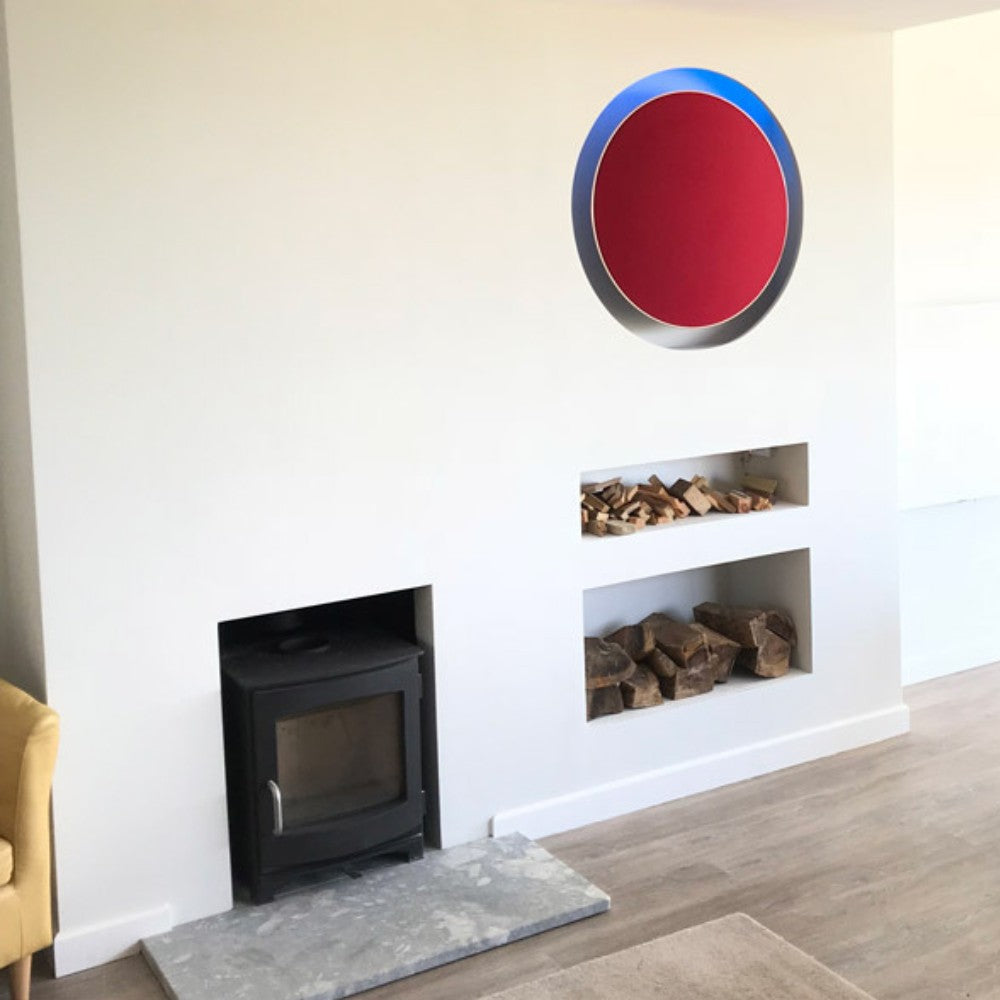
The pics, a few paragraphs into this article, show the lazy-bod method. It looks surprisingly effective and fits the architectural “honesty’ box. This is actually in my house (in “the snug” and in the lounge). The inside of the recesses I sprayed in black stove paint and, by the time the stove was in, the recess cannot even be seen due it being dark. Admittedly it is a small recess so not much gap to peer into and it is very dark in there. It might also be called the "it is too dark to see how crappy the surface is" method.
Essentially one just plasterboards the front of the chimney breast and adds a little "return" into the recess (using 12mm Hardiebacker for just the return as this is where the real heat is). I actually recommend NOT plastering the return as plaster can crack under high heat (I forgot to tell the plasterer this). We’ll see if it cracks! Update: it did! Paint directly onto these un-plastered Hardiebacker-returns same as the rest of the chimney breast. Hardiebacker paints fine same as plastered surfaces.
There is an even lazier method and you might even avoid any plastering!
What lining board should I use for my fireplace?
When lining the complete inside of a recess the board I always used is 12mm Hardiebacker cement board about £12 a sheet 1.2m x 0.8m (NOT the new lightweight plasterboard stuff but the heavy concrete board). The cement board is smooth (one side smooth, one side slightly textured) and can be painted with bog-standard emulsion. I have lined, at the time of writing, over 100 fireplaces with Hardiebacker over a five year period and have never had a customer complaint (aside from a few small spider cracks sorted with Decorator’s Caulking). Here is Hardiebacker’s official fireplace-lining leaflet.
HardieBacker® 12mm cement backerboard (previously named HardieBacker®500) has been evaluated in accordance with the protocols and acceptance criteria of EN 12467 and was found to be compliant. HardieBacker® 12mm cement backerboard is fire rated class A1, meaning the product is non-combustible. HardieBacker® 12mm cement backerboard is CE approved and BBA certified since May 2004. Hardiebacker say it is fine for up to 100 degrees centigrade (it will not set on fire but can crack).
Note that you can get spider cracks in Hardiebacker (if if your stove is closer than 6″). This is more likely on the rear wall (where stoves are often 3″ or 4″ away from the wall). Cracks will usually be minor and can be repaired with Decorator’s Caulking. I have heard that compressed Vermiculite board (about an inch thick) is far better but it is very expensive and thick (reduces width of recess maybe too much). If you are after perfection then you might wish to add a layer of thin steel (1-2mm) to the Hardiebacker as a final and paintable surface. I have done this on back walls a few times when the fire has been close (stops you seeing spider cracks ;-)
Another product is Thermalux (http://www.stovesonline.co.uk/stove-chimney-documentation/Thermalux-Heatproof-Stove-Installation-Sheets-72.pdf). I have not used it but a stovefitter I know uses it all the time to line recesses. Other lining products include Supalux, Skamolex, or Glasroc FireCase.
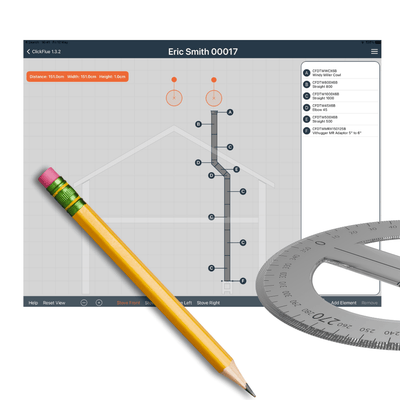
How to choose and measure liner
Tell me what to buy for my fireplace install

Update September 2017: My local fitter (and a few others I have met) has started using Multi-pro board and swears by it saying it is “much better than Hardiebacker”. He says it does not crack and can be scored with a knife and snapped (I have not tried it):
Your “closure” plate, that seals off your chimney if you have a chimney liner, can also be made of one of these makes of board (not to be confused with a “register plate” used when there is no liner and then must be metal).
Update to this article: although i have suggested dri-wall adhesive (dot n dab) to stick Hardiebacker board to walls (as I have often done) but the manufacturers recommend a concrete-based tile adhesive.
Surveying your fireplace opening
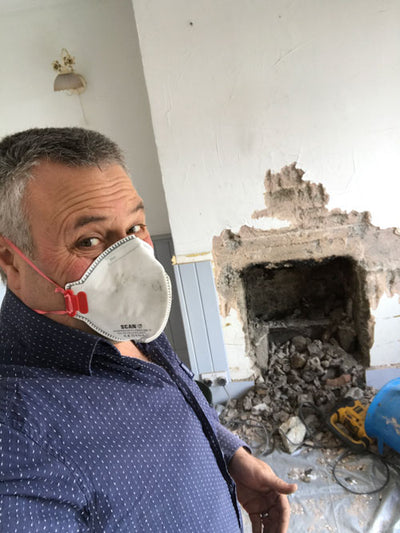
Okay, you have completed your breakout to your builder’s opening, ensured a lintel or arch is in place, and maybe fitted your hearth (you can do the hearth before or after the lining of the recess). Hearth regulations and sizes here
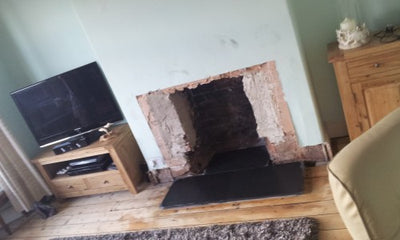
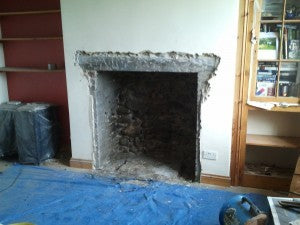
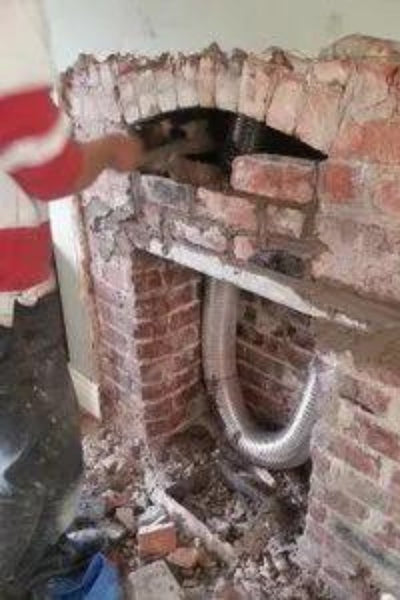
This is the sort of picture we should be looking at (with or without hearth):

How to cut fireproof Hardiebacker lining board (courtesy of "Kenny")
"Hopefully, I’m able to give you a tip that will save you a lot of time, effort, and dust. I note that you use Hardibacker in your installations (as do I) and use a 115mm diamond tipped blade to cut it. I found this method to be very dusty and getting perfectly straight lines difficult. I quickly switched to score and snap and found it time consuming and often the snapped edge wasn’t great. I hunted high and low for a solution and finally after many months I stumbled across these little beauties:
Jigsaw blades
I use these in a £20 Erbauer jigsaw from Screwfix and they make mincemeat out of 12mm hardibacker. I’m still on my first blade and I’ve made dozens (possibly hundreds) of cuts. Being able to cut hardi with a jigsaw gives you loads of control and I can also cut out neat circles for my vit pipe to go through. You can even scribe your hardi into an uneven surface (i.e. stone) and follow the line accurately with the jigsaw for a very neat fit. Dust is about 10% or less than that created by a diamond blade. These blades are probably my second favourite tool after my Bosch PCL 20 laser, which makes getting everything lined up, straight, and centred a total breeze.
I hope my little tip is of some use to you. Happy stove fitting."
- KENNY THE INSTALLER
Fitting the cement boards into the recess
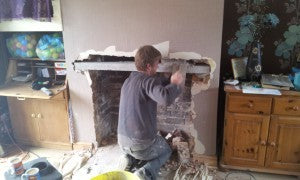
The pictures below are worth a thousand words. You can see the smooth walls of the builder’s opening. Plaster is off to see what is happening. You can see a new lintel being fitted below the discovered arch (arch is fine and lintel added by choice here). You can see the bricking up between the lintel and the arch. You can see the liner ready to go.
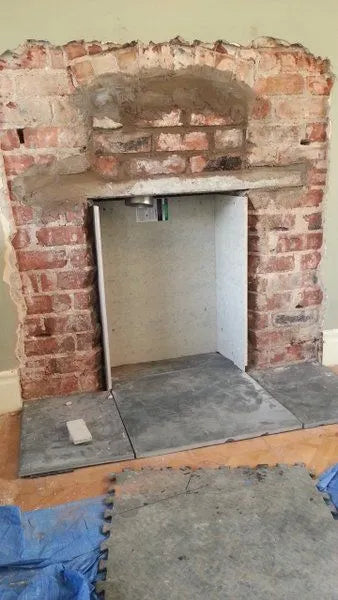
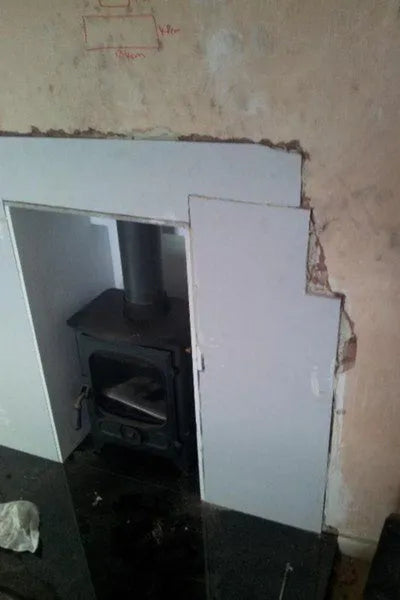
Same fireplace (middle). Hearth down first. And now you can see the first three 12mm cement-boards. I put the rear sheet in first (cut using angle grinder although a circular saw or jigsaw with a concrete cutting blade will do). On the rear sheet I ensure the factory cut edge is at the bottom..
The two sides go in next, again factory-cut edge at bottom. Most fitters will do the same: fit the side and rear boards before the top closure plate (plate that blocks off the chimney). The closure plate can “slide in and sit on top of the side boards and back board” like a shelf.
You will find it easier to bond the rear board first, before measuring and cutting the side boards (otherwise you will be guessing the thickness of your "back wall board + adhesive" which is not possible to do accurately.
This article continues as if the closure plate is being fitted last of the three boards but bear this in mind when thinking about your install. Ensure 15mm gap for closure plate to slide in. Of the three vertical boards, the rear board is the one you will cut first. Hardiebacker cement board is 1.2m x 0.8m. Ideally you want one piece at the back, rather than two, but this is not always possible. If you have to have a join have it down the middle maybe?
Removal of plaster has exposed the situation. Arch has been discovered. Installer adding a lintel because he wants it lower (the arch was completely fine otherwise).
Rear and side Hardiebacker boards are installed using dot n' dab. You can just see the liner adaptor hanging.
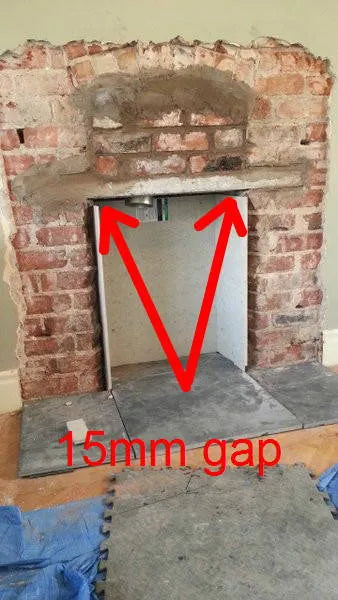
Leave a 15mm gap so you can slide your 12mm Hardiebacker board (with hole already cut - no need of hole neatness as sealing plate hides it). Hardiebacker slides in like on a shelf then you screw it up to the lintel through pre-made pilot holes (I used two Thunderbolts about a third from each end of lintel).
Taller fireplace but fully ready to accept skim bead and then final plastering.
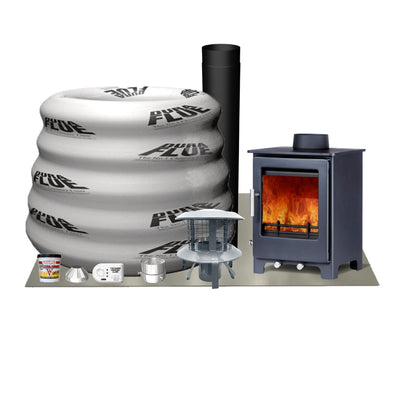
Chimney liner & fitting packs
View all


The process of dot and dab
See images further down in this article.
The round circles are “dri wall adhesive” and the smooth white area is board. Dabs flatten when board is pressed against them
Mix dri-wall adhesive with water so you get a thick consistency (wetter rather than drier is better).
Coat the board and the wall with copious amounts of the PVA adhesive to remove dust and prepare your surfaces (see PVA image).
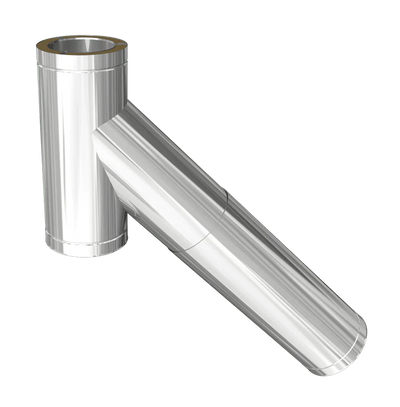
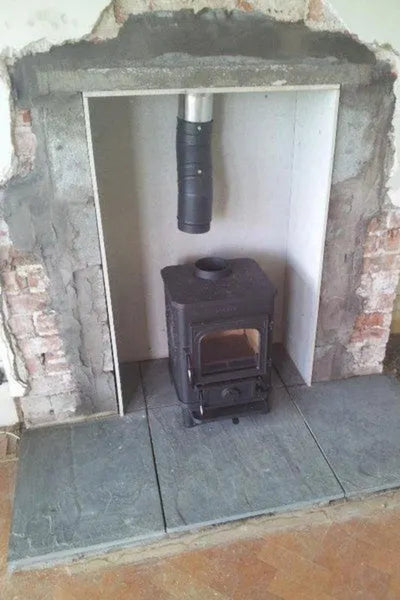
What we are aiming to achieve (prior to fitting plaster's skim bead). Note 2x 30 degree elbows on this install - to move stove away from back wall.
Fill deep holes in wall with spare mortar or use "bonding" (used before plastering to fill crevices and holes).
NOTE: Feedback suggests that it is better to “smear” the dri-wall rather than have large independent islands of the stuff – thick scattered blobs can cause shrinkage in the dri-wall with this warping the boards. The less air between the board and the wall the better (a fellow stove fitter reckons air pockets is what causes minor cracking of Hardiebacker under extreme heat due to the trapped air expanding).
Don't over worry though, I did so many with large dot/dab lumps and everything worked fine for me.
Leave 12 hours to go off.
Preparation
See images further down in this article.
Before you start you will want to paint the surface of the inside walls of the recess and one side of the cement board with a PVA mix (3 water to 1 PVA). This is very important as without this stage the bond between wall and board may not be good.
You do not need to let the PVA dry and if it does dry add another wetting.
Warning: The height of the boards is critical: you want the top of the rear board to be completely horizontal and 15mm below the height of the lintel.
The 15mm gap, above the three vertical Hardiebacker plates, allows another sheet of cement board to be slid in as a “roof”: the closure plate.
The height of the boards is critical: you want the top of the rear board to be completely horizontal and 15mm below the height of the lintel. This is because the top edges of these first three boards will provide a shelf, a flange, on which your closure plate will sit (your closure plate will be made of the same board and will slide in to sit on the first three boards).
Why 15mm?
Because the Hardiebacker closure plate is 12mm thick and we want as little gap as possible between the top of the board and the bottom of the lintel (we’ll be screwing the closure-plate board up to the lintel shortly).
The two side boards will be exactly the same height as your rear board and also need to be completely spirit-level horizontal along the top edge. These side boards will also need to stick out into the room to approx. the same amount as the finished plastered wall needs to end up. You will likely still have plaster on your chimney breast so can use a straight edge, laid flat to the breast, to get a feel for this. But, you will be attaching “skim bead” to the front edge of the left and right vertical Hardiebacker boards and this bead will stick out a further 3-5mm so bear this in mind (my Hardiebacker boards used to stick out into the room 3-5mm less than one might think for this very reason). Skim bead is a hard strip that you will plaster to and makes a good and solid metal corner.
How do we attach the lining board to the inside walls of the recess?
See images further down in this article.
Quite simply we use dri-wall adhesive (available from all good merchants). See "dot n dab" mentioned previously. This is exactly the same process as is used to attach plasterboard to a brick/block/stone wall. Note that you can use Thunderbolts instead of adhesive and we often do if the walls are flat and true. If you do this you have to countersink the holes in the board and use Thunderbolts with tapered heads.
You will need to paint the surface of the inside walls of the recess and one side of the cement board with a PVA mix (3 water to 1 PVA). This is very important as without this stage the bond between wall and board may not be good.
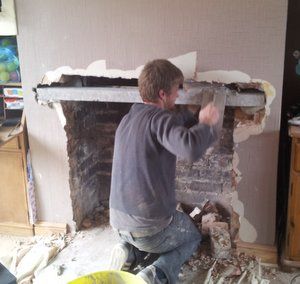
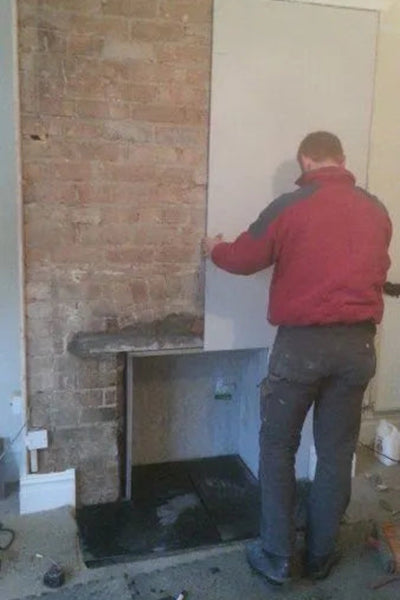
My colleague is seen in one of the images cutting plasterboard to fit the chimney breast in readiness for dot and dab. Often it is easier to remove all the plaster from a breast (especially if it is old and not well attached). Plastering a whole area can also be easier than trying to blend a small “repair area” into the rest of the plaster.
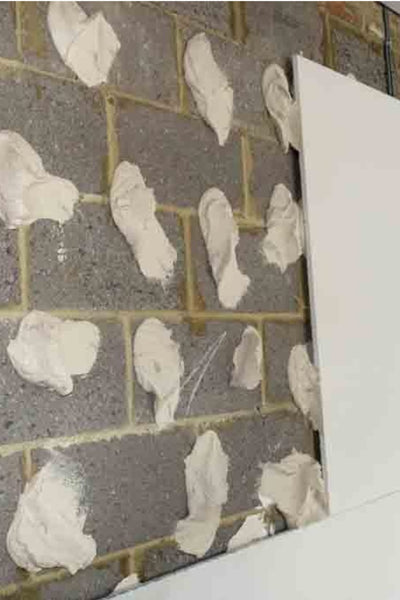
Dot & dab. The round circles are “dri wall adhesive” and the smooth white area is board. Dabs flatten when board is pressed against them.
What we are aiming to achieve (prior to fitting plaster's skim bead). Note 2x 30 degree elbows on this install - to move stove away from back wall.
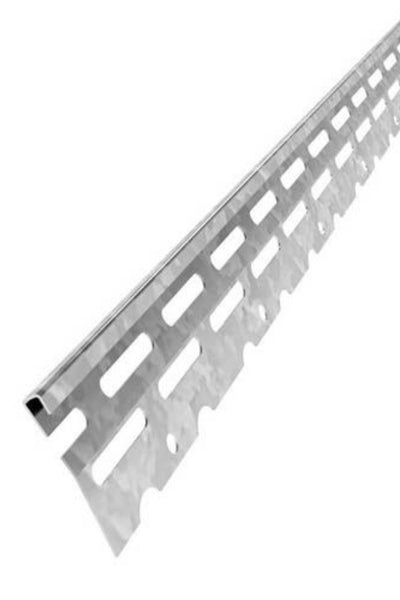
Edge skim bead (NOT corner skim bead).
You ARE allowed to put plasterboard on a chimney breast. No harm in asking the person who will sign it all off though - they may ask you to use "pink plasterboard" and it is not some weird Barbie joke.
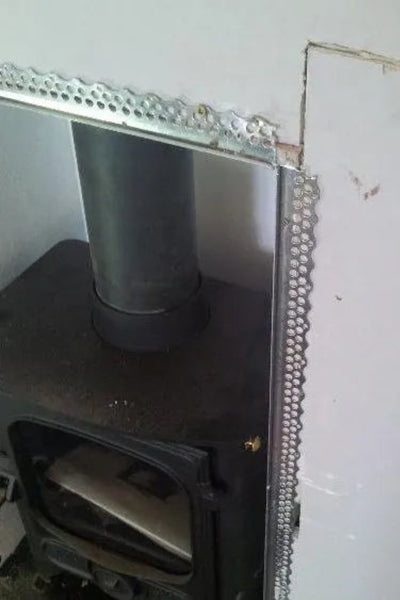
Skimbead. Use short "clout nails" to hammer into the bonding around your recess edges then plaster.
Plasterboard patching. Note that you do not have to use plasterboard – you can fill with bonding and then plaster.

Finished result ready to plaster
Use a spirit level
You will use a spirit level to check the sheets in the recess are vertical (in line with the wall anyway and the wall in some houses is not vertical) and the top closure plate edge is horizontal. You can tap wedges along the bottom of the vertical sheets if required. Don't worry about gaps in the corners as we will fill these.
You will find it easier to bond the rear board first, before measuring and cutting the side boards (otherwise you will be guessing the thickness of your back wall which is not possible to do accurately.
Before we proceed to our “closure plate” (the plate that seals off the chimney) I want to proceed with a “here’s one I made earlier”. In other words I am going to move forward in time to a point where our closure plate is already fitted. We’ll come back to the creating and fitting of the closure plate in another article so forget it for the moment.
The finished result
The last image shows the chimney breast ready to plaster. The skim bead is in place. Note the centre join in the cement board: the white stuff is Decorator’s Caulking applied with an old credit card. Decorator's Caulking can be painted (do not use Silicon as paint does not adhere to it). No need to prepare surface for the caulking. If you have a line where two boards meet score a V-shaped valley down the line of the gap - something for the Decorator's Caulking to get a grip of.
Fitting your liner into your chimney
The process
Okay, off we go:
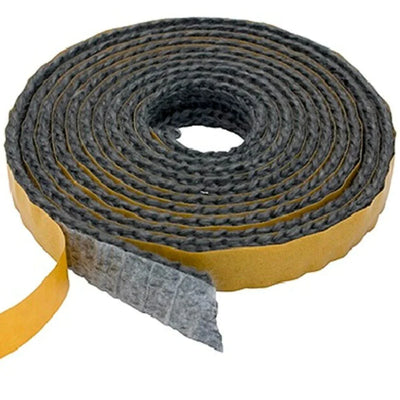
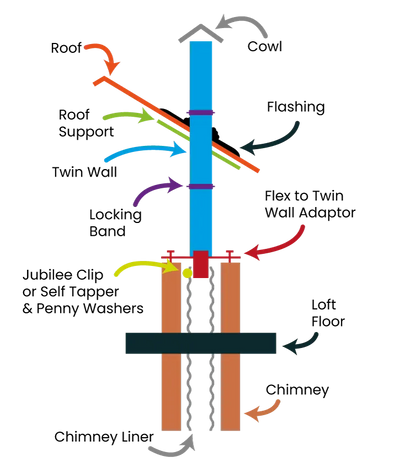
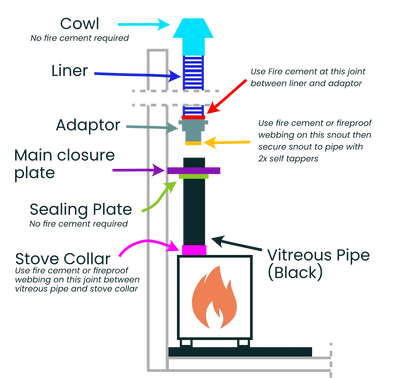
1. Slide the liner down chimney Then attach the adaptor to the bottom of the liner using a couple of small self tappers to stop it falling off unless it has captive bolts that do the same job. Attach the black vitreous flue pipe to the adaptor using self tappers, filling any air gaps at both ends of the adaptor with fire cement. If the adaptor snout is a bit loose use (it will be) use fireproof rope or webbing around the snout.
2. Go to top of chimney and pull the liner up until the newly-attached vitreous pipe is “up the chimney a little, out of the way" so the closure plate can be fitted.
3. In the stove room finish the whole job: hearth down, line fireplace, slide closure plate in, plastering, stove in place, cup of tea etc. Closure plate installation here: Wood burning stove in a fireplace connected to a chimney liner
4. Reach up the through the hole in your closure plate (you did make a hole I hope - 1" larger diameter than your flue pipe) and grab the vitreous pipe and pull it down through the hole and down to and onto the stove. Do not forget to slide your 9″ sealing plate around the pipe when you do this – in readiness for screwing it up to your closure plate. It is the sealing plate that hides the gap between the flue pipe and the slightly over-large hole.
5. Back up to the top of chimney stack.
6. Use a marker pen to mark the liner about 1″ above the chimney pot.
7. Then pull the liner up 6″ to give you room to work.
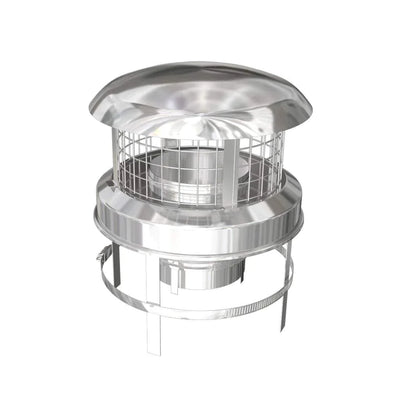
8. Cut the liner at the marker pen mark (hacksaw. grinder or tin-snips). Fit the cowl to the liner using the supplied Jubilee clip.
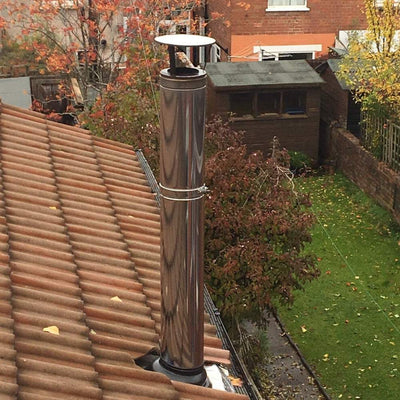
9. Drop the liner back down, slipping the vitreous pipe into the stove. Secure the cowl to the chimney pot using the second Jubilee clip. Back down to the stove where you can screw the sealing plate to the closure plate (screws in Useful Items Kit). Use a spirit level on your flue pipe. Bob should now be your uncle.

Liner sticking out of chimney pot ready to accept cowl.

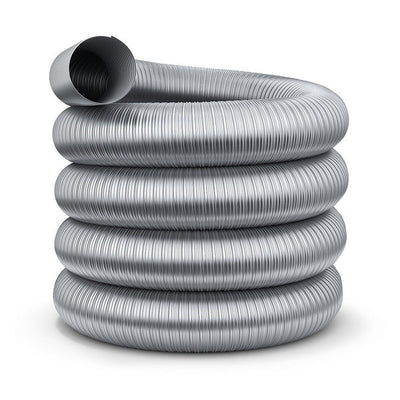
Silvacore: a premium-quality liner.
Stainless liner adaptor: connects liner to black pipe on top of stove (vitreous pipe).
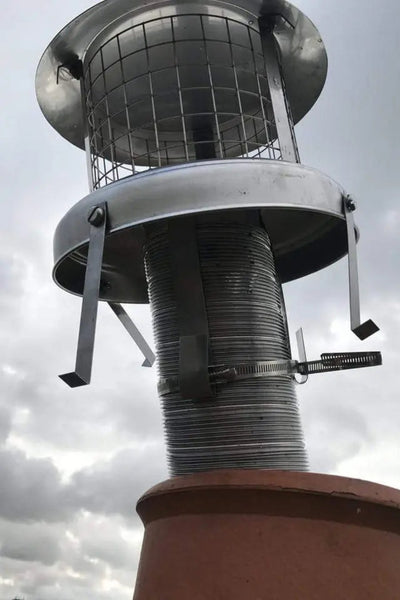
Cowl snout inserted into liner and Jubilee clip used to secure. Now ready for second much longer Jubilee clip for pot (clips supplied with cowl).


Note that where the pipe enters the stove webbing is the best thing to use. Fire cement cracks and breaks easily and ends up looking messy. The black fire cement dries grey and looks rubbish.
As already suggested: The fitting of the stove and closure plate is outlined in more detail in a separate article that you should also read: How to connect a wood burning stove to a chimney liner
Useful stuff
View all


Adjustable vitreous?
When installing the closure plate, it is not always easy or possible to pull the liner up and out the way. For example, if the liner is a tight fit in the chimney or you fitted the liner/cowl the weekend before, during a rare UK sunny weather slot, and the cowl is now fixed in place and the scaffolding has left and is on somebody else’s house. In this case you cannot “slide in your closure plate like a shelf” ‘cos the liner is in the way and cannot be moved. Also you will struggle to fit the stove later because the process involves "sliding the liner back up the chimney a little". Liner does not compress.
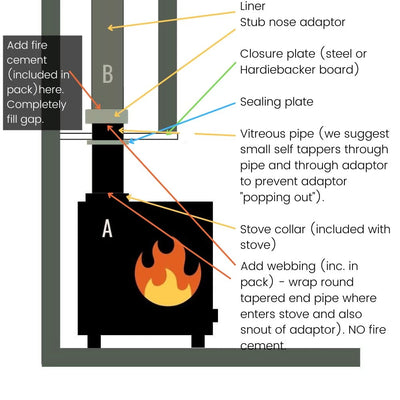
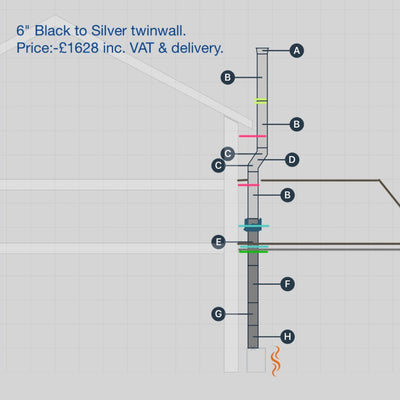
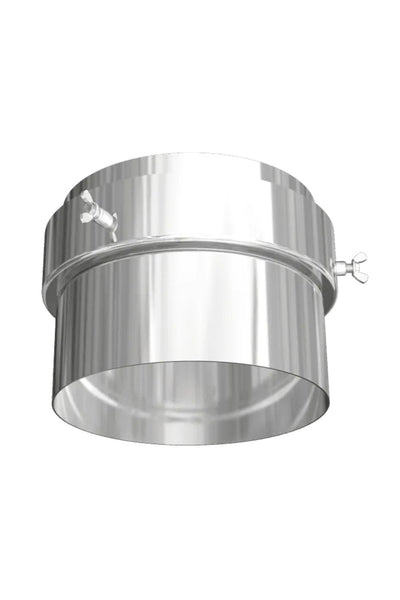
In this case you must fit the closure plate PRIOR to fitting the Hardiebacker-sides. Also, to assist later stove installation, choose a tapered adjustable vitreous pipe section (5" and 6" versions available) and let it drop through the hole in readiness for making the fitting of the bottom section of vitreous pipe, later on, easier. Essentially you are adding some adjustability to the system using a telescopic part.
Adjustable vitreous (yellow on diagram) will hang through the closure plate at least 4″ allowing you to easily slide your vitreous up and over it then drop it back down into your stove collar. When it comes to fitting your stove this can make life a lot easier (the stove-fit can be problematic if the liner has no movement because vitreous pipe needs to lift “up and over” a 2″ to 4″ high stove collar and liner has zero compression).
Finished plastering. Ready to paint when the plaster has dried. Inside of recess can be painted but should never be plaster-skimmed as the heat will crack the plaster. Note this job was a large opening so the rear wall used two sheets of cement board.

The closure plate
The fitting of the closure plate is outlined in more detail in a separate article that you should also read: How to connect a wood stove to a chimney liner
Buying guides
View All
How to choose a wood burning stove for your property (includes infographic)
Infographics

What size wood stove do I need? Don't let manufacturers fool you!
Buying Guides
Do I need an air vent for a wood burning stove? If I do not bother?
Buying & DIY

Knowledge Tree: Process of buying and installing a wood burning stove
Buying & DIY
Chinese wood burners – should I buy one or are they all crap?
Buying Guides

What else do I need to buy to install a wood burning stove?
DIY Guides
Infographics for wood burning stove purchase and install
Infographics
Wood burning or multifuel stove? A stove fitter decides.
Buying Guides

A few words from Julian
Buying & DIY