


How do I fit a chimney flue liner to a pot or cowl?
5 mins
How do I fit a chimney flue liner to a pot or cowl?
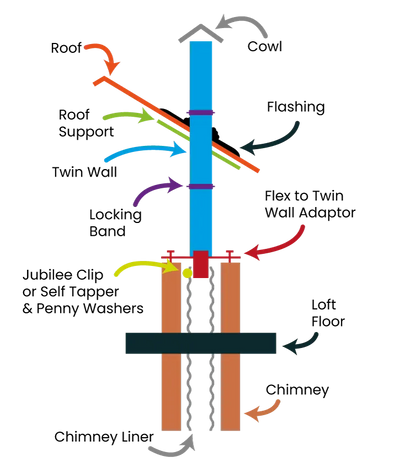
Your chimney liner needs to be connected at the chimney pot. There are two standard methods of achieving this: 1. Hanging cowl method (if no liner insulation to be used). 2. Mortar inside chimney pot method (suited to bare liner or Vermiculite insulation or blanket wrap insulation).
Method 1: hanging cowl method (no insulation)

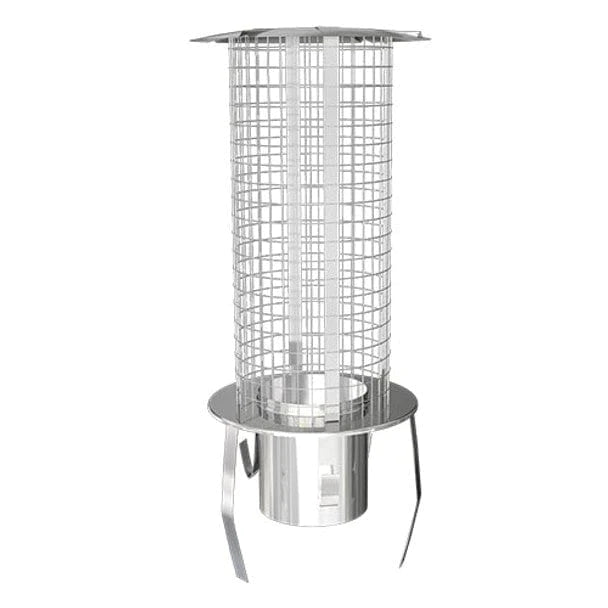
This is a very simple method with many advantages and some disadvantages. Essentially you hang your liner from the cowl, the cowl having a male tube that inserts into the female liner with a Jubilee clip clamping the female liner around the male tube. To be truthful most chimneys are narrow enough that the liner is fully supported by the chimney itself with just a little weight pressing down on the stove.
Tip: The Jubilee clips will only tighten with a screw driver with the “bolt part” flat against the liner.
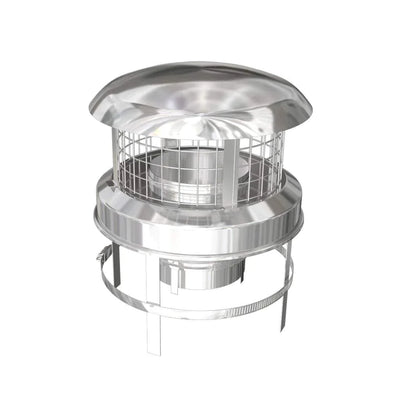
The cowl pictured, is a “Hanging Cowl” type (not the model we now sell but similar).

The cowl comes with two Jubilee clips (one longer than the other). One clip wraps around the three inner straps to connect the liner to the snout of the cowl. The other clip attaches the outer three straps to the pot.
OFTEN IT IS BEST TO “FIT YOUR COWL LAST JOB” (e.g. When you use a fitting where your liner is connected to your closure plate at the bottom (e.g. a sealing-plate-adaptor-combination) and is “fixed” and cannot be moved. In this case, in order to proceed, leave a little liner sticking out of the chimney, just enough to get the supplied short Jubilee clip onto the cowl snout. Press down very firmly on the cowl so the liner compresses and the cowl touches your pot allowing you to add the longer, outer Jubilee clip around the pot itself. If the chimney is tight and the liner will not compress at all then you can a) choose not to fit the inner Jubilee clip or b) add some mortar to secure the last few inches of liner to the pot (see last paragraphs of this article).
As can be seen the liner is now connected to the cowl. I fit these cowls very often as they are swift and effective. In practice the liner is usually well-supported by the tightness and various bends in the chimney flue (unless in a larger chimney and in this case the “use roofing screws and washers instead of a clip” is generally considered the better option especially if the liner has heavy insulation).
The hanging cowl has two main advantages:
1. Fast to fit
2. If your existing pot is suitable you do not need to fit a new pot.

Note: As long as your liner will fit down the pot then many pots will be okay for the hanging cowl – it all comes down to aesthetics. However, anything that it is very tall or with an ornamental top can be cropped to make life easier when fitting or improve the aesthetics. I often crop pots.
To cut a pot down you need an angle grinder with a suitable 115mm cutting disc (I use general purpose diamond tipped blades).
WARNING: Chimney pots are very heavy and the part you cut off can be very heavy. The weight of the top part, when it comes away from the bottom part, can trap your cutting blade causing your angle grinder to to spasm and jump. This is not a nice operation. Only attempt this if you are using a cherry-picker or have a suitable platform or scaffolding or a suitable base on which to work. NEVER attempt this from a ladder.
Also I often have two people (me and another). I first cut a line all the way around about half way through in depth. Then we wrap the pot in a hessian type dust sheet (to stop bits falling) and then tap it gently with a lump hammer, reaching under the sheet to extract bits as they fall off. The cut line prevents any cracks passing past the line (hopefully). If it does not work one just has to fit a new pot. There is of course a risk of a big piece coming away and as a stovefitter I just have to deal with it.
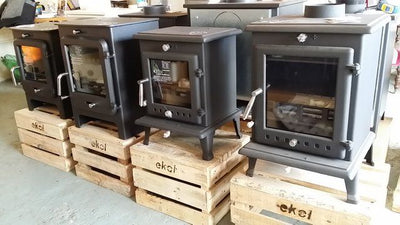
Image: Looking at the picture on the left… one could probably fit a hanging cowl to any of the pots shown. One could also cut off the tops of many of them.

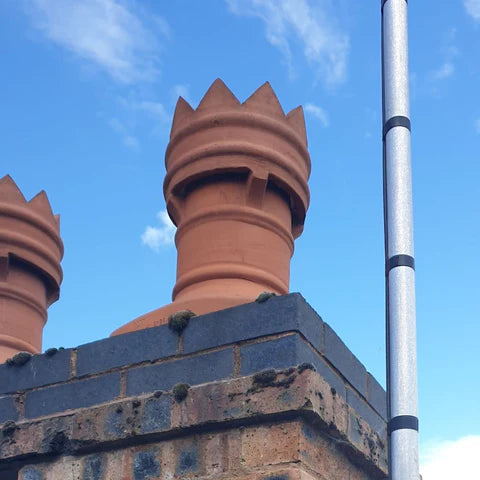
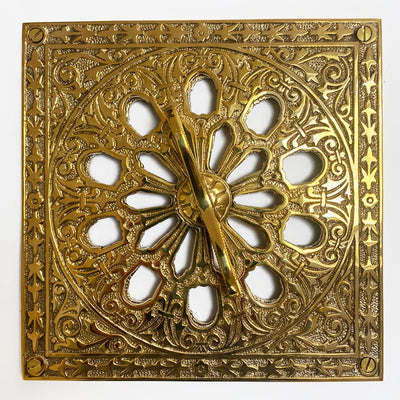
"Bishops pots" you may have to buy a special cow. This one, by Duraflue, sits part inside the pot.
Method 2: inside chimney pot method


Top Plate And Top Clamp: The top plate and top clamp are used together as one a method of fixing the chimney liner at the top of the stack. It is necessary to remove the chimney pot, fit the chimney liner in place with the plate and clamp, and then refit the chimney pot once installed. The chimney liner passes through the hole in the plate and is gripped in place above this with the top clamp. For a secure fixing, it’s recommended to use a top sleeve. The top sleeve fits inside the top of the chimney liner and gives a solid inner for the top clamp to grip against. Fill the gap between the liner and the pot with a sand/cement mix, at forty-five degrees so any soot build up runs back down into the liner.

Secure the pot by flaunching with one course of bricks (ideally if there is room) and a 3:1 sand cement mix.
Add a cowl that will prevent bird and rain egress. Cowls (must be for solid fuel as some are for gas and oil).
Note: If adding Vermiculite follow the instructions as detailed below but adapt as required: obviously you will pour the Vermiculite in before the plate goes on.
Method 3: liner and existing pot (with or without Vermiculite)

Do you need to insulate my liner? In my opinion generally not. See here: https://www.stovefittersmanual.co.uk/articles/should-i-insulate-my-chimney-flue-liner/
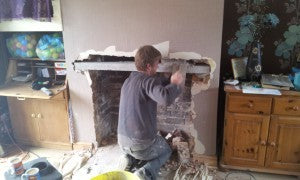
You will not add Vermiculite until the stove is fitted and the register plate (also called a closure plate) above the stove is fitted (otherwise it will just pour out of the chimney and into the room). So you need to check out the stove-fit sections and come back here afterwards. Best to read it now to get an idea of what is to come later.
You will be in the position as seen in the picture on the left (unless pouring Vermiculite PRIOR to the pot going on and then you will find it even easier – just fill that chimney up).

Vermiculite (Micafil, pictured, is a brand name) is supplied in bags. It resembles a muesli breakfast cereal. It is very light and will be taken by the wind easily.
Vermiculite cannot catch fire and is used to insulate around chimney liners. It is poured into the top of the chimney and will cascade down the chimney onto the register plate, filling the gap between the liner and the chimney itself all the way to the top.
Vermiculite is only suitable for chimneys with a few inches of air gap. If your liner has more than a few inches of air gap you are going to use a heck of a lot of Vermiculite. To be safe allow 1 bag for each metre of chimney you need to fill. If you really hate the idea of having any left over you can budget for 0.8 bags per metre and hope you do not run short.

The simplest method of filling is to obtain one of those “Gorilla buckets” as favoured by builder’s or horsey folks. Cut a hole in the bottom just slightly smaller than the hole at the top of your pot then slip it over the bit of liner sticking out of your chimney pot. Tape it to the pot using Gaffer tape or similar. Passers by love to shout comments at this stage but just ignore them. If the protrusion of liner is “inside the bucket” then stuff a rag in the end to stop Vermiculite going down the liner.
Pour Vermiculite into your new “funnel” (the bucket”) and keep doing so until your chimney is full.
You want to end up with a picture that looks like so:

Note that this method of attaching liner to pot is not to be used if your liner is wrapped (rather than Vermiculite).
You will need to cut the liner just above the top of the pot (1-2cm) using an angle-grinder, hacksaw or tin snips. I like this 1 cm as it allows the sand cement mix to overlap onto the top of the pot, this all asisting its grip on the pot itself.
A 3:1 sand cement mix will do here. The Vermiculite will provide a base for the mix (you will of course have to extract some Vermiculite (wriggling the liner will “settle” the mix and this also works).

Should you wish, for any reason, to secure your liner at the top but are not adding Vermiculite you need to prevent the mortar just falling into the chimney. I push rolled up chicken wire into the gap between the liner and the pot – making sure it is about 6″ down into the pot. This prevents the mortar (as long as it is not too thin) from passing this man-made barrier. Essentially the chicken wire is rolled just a bit too big and it compresses when you push it in around the liner (so the chicken wire does not fall down the chimney).
With your mortar set hard you can now fit any chimney cowl (with the hanging cowl the snout will just slip inside the liner)..
Are you off to fit a chimney liner now?
You might need...
View all


FAQs
See all FAQsCosts correct as of April 2023:
Approx. costs if you have a chimney and fireplace ready to use: £750-£1,000 (save £500 by self-installing).
Approx. costs if you have a chimney but need the fireplace "opening up": £1,600-£2,200 (save £1200 by self-installing).
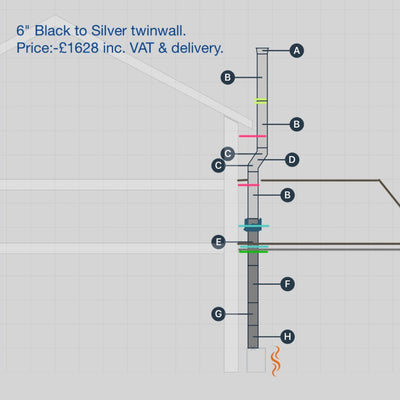
Approx. costs if you do not have a chimney and need a clip-together flue: Shed £475-£700. Bungalow £1500. 2-storey house £2500. Save £1,000-£1400 by self-installing.
Above figures include labour and materials but no appliance.
We, of course, advise you to purchase your stove and materials from Stovefitter's to ensure quality goods are installed (some installers use budget materials to increase margin). If you buy your stove from us (rather than your local small shop or installer) we have a lot more power when approaching manufacturer's with a warranty issue. Why is that? Because we buy many hundreds of stoves a year from these brands.
We do not fit stoves.
But we know a few who do!
Google: Hetas installers
Hetas are the trade body of registered UK installers.
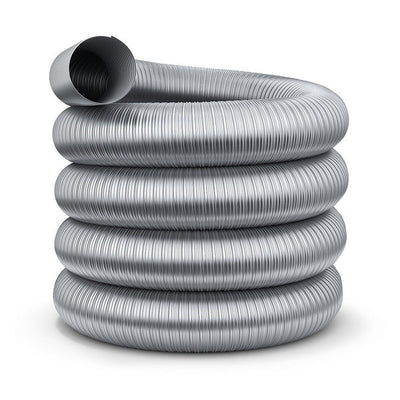
Most installations will require that you slide a chimney liner down your chimney (flexible metal tube 5" or 6" in diameter). Do you have a narrow chimney and want to lessen the risk that a liner might not go down your chimney? Then make sure your chosen stove can use a 5" liner.
Must I line my chimney? Best read this article but most likely the answer is yes. Do I have to fit a chimney liner?
DEFRA-Exempt wood burning stoves with a 5″ collar can usually be fitted to a five inch liner rather than the usual 6″ minimum, making the installer's job much less stressful.
ALL OF THE 5KW STOVES WE SELL CAN BE FITTED TO A 5" CHIMNEY LINER.
I seriously suggest any self installer fits a 5" liner unless they know their chimney is large enough for a 6"!
What is the best chimney liner? Silvacore 904 (we sell it so of course we will say that ;-). What is the best chimney liner?
Useful links
Will your stove require an air vent within the room (some stone walls are very difficult to drill)?
5kW or under and wood burning stoves often do not require an air vent (new builds always require an air vent).
Useful links
What is the maximum output in kW of your "5kW" wood burning stove? The majority of manufacturers just specify the “nominal output” and this figure means very little in real life. The nominal is a figure the manufacturer chooses to sell the stove at - the stove is capable of reaching at least this output with one fuel load. Nominal means "capable of". But it is not the maximum.
Check out the size of the area where the logs will go (firebox size) as this varies enormously. The kW output is completely dependant on the amount of logs burning at any one time - more logs burning equals more heat. If you can fit three logs in stove A and just two logs in stove B then stove A will be capable of throwing out 33% more heat.
DO NOT TRUST MANUFACTURERS’ kW RATINGS as manufacturers specify what output they desire to sell the stove at and testing allows for much “playing with the figures”. This is why you can get very small 5kW stoves (e.g. Aga Little Wenlock) and very large 5kW stoves (e.g. DG Ivar 5 by Dik Geurts which is actually rated 5kW but has a MUCH larger firebox than the Ekol Crystal 5 by Ekol Stoves). A Crystal 5k might get to 5kW and not be capable of any higher whilst a DG Ivar, despite being rated at 5kW, can get to 8kW with a full fuel load.
Note that, over time, one might damage the internal firebricks of a stove by running at a higher load than the manufacturer's suggest. Firebricks are easily replaceable.
Useful links
Will your wood burning stove fit in your recess WITH the required air gaps around it? This is obviously not an issue if your stove will be freestanding.
Air gaps to non-combustible materials (brick, stone etc.) are usually "as close as you like" legally but manufacturers will sometimes specify a recommendation. This recommendation is there to allow heat to escape from the recess into the room - so you get the heat benefit rather than the heat soaking into the building structure and being lost. If no gap to non-combustibles recommended then we suggest 50-100mm air gap left and right of stove, 50mm behind and 100mm above.
Are you in a Smoke Control Area (usually built up areas)?
Choose your stove accordingly.
A stove must be DEFRA-Approved if you wish to burn wood in a smoke control area.
ALL OF THE STOVES WE SELL ARE DEFRA APPROVED FOR SMOKE CONTROL AREAS.
In simple terms if a stove has an efficiency rating of 70% then 30% of the heat from your logs goes up the chimney.
If a stove has an efficiency rating of 90% then only 10% goes up the chimney.
So think of this in terms of how many logs you have to chop/buy.
Example: A Saltfire Peanut 5 by Saltfire Stoves in Dorset has an efficiciency of 80%.
A tall chimney (6m or more) that is lined will be happy with an efficient stove.
Efficiency importance can be said to be overrated and anything between 75% and 85% is fine. Go much higher and performance can actually suffer (smoke in room when opening door to reload, blackening of glass).
Many modern stoves can go on 12mm thick hearths. Others require full, 5″ thick constructional hearths. All of the stoves we sell state whether or not a 12mm hearth is suitable.More about hearths for wood stoves here.
Helpful links
Can you can talk to somebody on the phone should you need to after the wood burning stove has been delivered, especially if you are self installing? Will the staff at “wesellzillionsofstoves.com” be able to assist with any installation issues? What if there are any problems after install?
Do yourself a favour before ordering stoves or materials on the Internet: Go to Trustpilot and type in the company name before you buy. Some companies advertising at the top of search engines are not good news - check for yourself.
When striving to find thebest 5kW wood burning stovesyou will likely be bewildered by the choice. There are many to choose from. The question I get asked most in our shop is “why should I pay <£1,000> for this one when this other one is just <£500>?”. Here is the very simple answer:the cheaper wood stoves are made in Chinaor Eastern Europe whilst the more expensive are made in Western Europe (or sometimes the USA). Here are a few examples where a more expensive stove might excel over a cheaper stove:
- Aesthetics (more time spent on design)
- Hinges (sometimes hidden on more expensive stoves)
- Better quality glass
- Thicker steel (longer life)
- Improved door locking mechanisms
- Longer warranty
- Improved controllabilty of flame due to more resource invested on design of air flow within stove
- Brushed steel fittings instead of cheapy chrome look
Open and close the door on a cheap Chinese stove. Then open and close the door on a DG stove, Arada stoves, Woodford stoves, Hamlet stoves or Saltfire stoves. You’ll understand the difference.
Stove pricing reminds me of wine pricing. A £20 bottle of wine is not double the quality of a £10 bottle of wine (the drinking experience might be improved by 20% as an example). We are talking “the law of diminishing returns here. They are all “fire in a metal box” at the end of the day.
Yes. However, there are specific regulations and restrictions in place to address air pollution concerns, particularly in areas designated as Smoke Control Areas. In these areas, only approved "smokeless" fuels or exempt appliances, such as Defra-approved wood-burning stoves, can be used. These stoves are designed to burn wood more efficiently and produce fewer emissions.
All the stoves we sell are DEFRA approved and Eco-design approved and suitable for all areas of the UK.
Terminology
View all TerminologyA stainless steel tube, slides down a brick/stone chimney to provide a smooth and safe route for smoke.
All of our stoves are approved by DEFRA to burn wood in all UK locations including Smoke Control Areas (towns and cities). Not all stoves are, so be careful if buying elsewhere.
All of our stoves are ECODESIGN approved to be sold in the UK. Not all stoves are, so be careful if buying elsewhere. ECODESIGN is mandatory by law since January 2022.
The base your stove sits on.
If the chimney is the polo mint then the flue is the hole.
Buying guides
The Stovefitter's Manual
How to choose a wood burning stove for your property (includes infographic)
Infographics

What size wood stove do I need? Don't let manufacturers fool you!
Buying Guides
Do I need an air vent for a wood burning stove? If I do not bother?
Buying & DIY

Knowledge Tree: Process of buying and installing a wood burning stove
Buying & DIY
Chinese wood burners – should I buy one or are they all crap?
Buying Guides

What else do I need to buy to install a wood burning stove?
DIY Guides
Infographics for wood burning stove purchase and install
Infographics
Wood burning or multifuel stove? A stove fitter decides.
Buying Guides

A few words from Julian
Buying & DIY
Find my perfect stove
Answer 3 simple questions and we will show you the best Stoves for your space.